How to sew a sleeve placket? Inseam Studios
Cut the sleeve and the placket open along the "Y" shape. Stop 3/8" (1 cm) away from the top of the box and cut on an angle into the corners. Clip close to, but not past, the stitching line. Working with one side of the placket at a time, press the placket away from the sleeve, towards the 'Y' opening.

How to Sew a Professional Sleeve Placket Threads
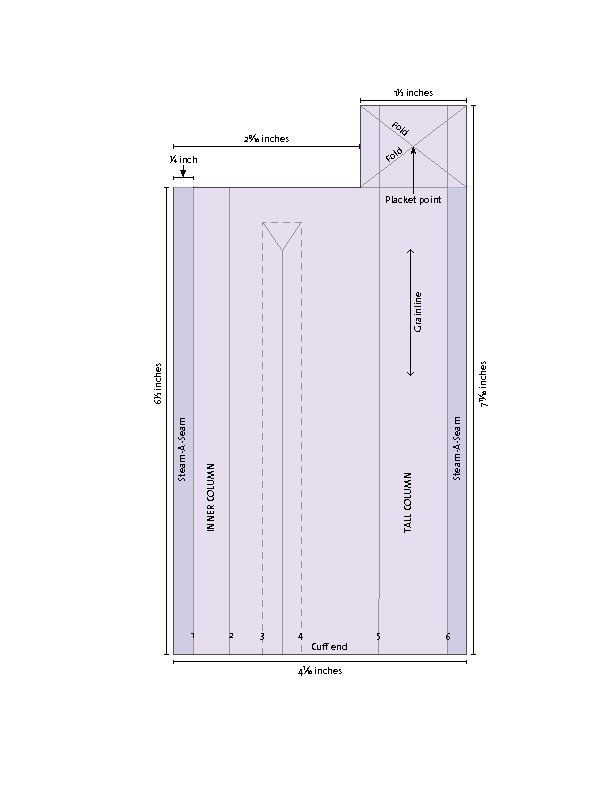
4" or more 2"-3" FOLD 5 FOLD 6 Cutting Line FOLD 2 FOLD 1 Stitching Box FOLD 4 FOLD 3 ¼" s.a. ¼" s.a. Sleeve Placket Pattern This schematic is for a placket for a right sleeve.

Tutorial Sleeve Placket Itch To Stitch
A placket (also spelled placquet) is an opening in the upper part of trousers or skirts, or at the neck or sleeve of a garment. [1] Plackets are almost always used to allow clothing to be put on or removed easily, but are sometimes used purely as a design element.

Sewing Style Classic Sleeve Placket Sewing, Custom design shirts, Sewing techniques
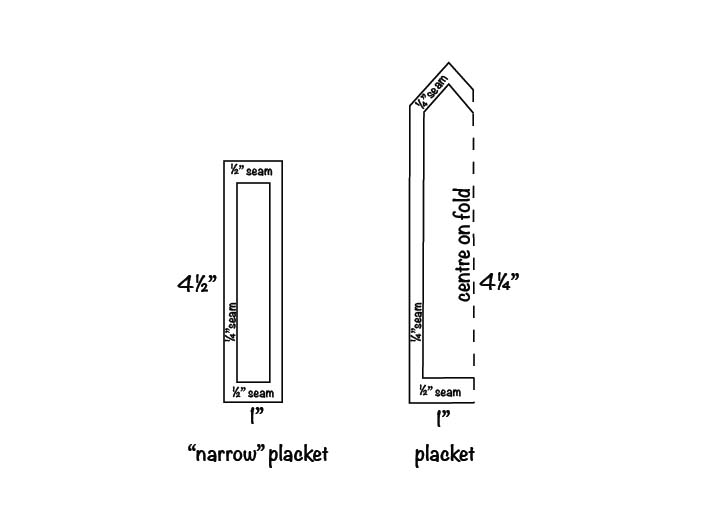
There are 2 main methods to apply sleeve plackets. Either- its applied as 2 separate rectangles of fabric: - method commonly used in fashion production. Or- as a single shaped piece of fabric: - method most commonly used in home sewing. Both methods can have either a peaked or square top depending on pattern design.
Tutorial Sleeve Placket Itch to Stitch
The most important facts about sleeve plackets are: The finished placket buttons toward the back, i.e., toward the sleeve seam allowance; and the placket overlap (the part with the peaked roof) folds over the underplacket. Notice how the placket folds toward the back of the ready-to-wear shirt.

Sleeve Placket Pattern Sewing shirts, Sewing pattern design, Sewing patterns
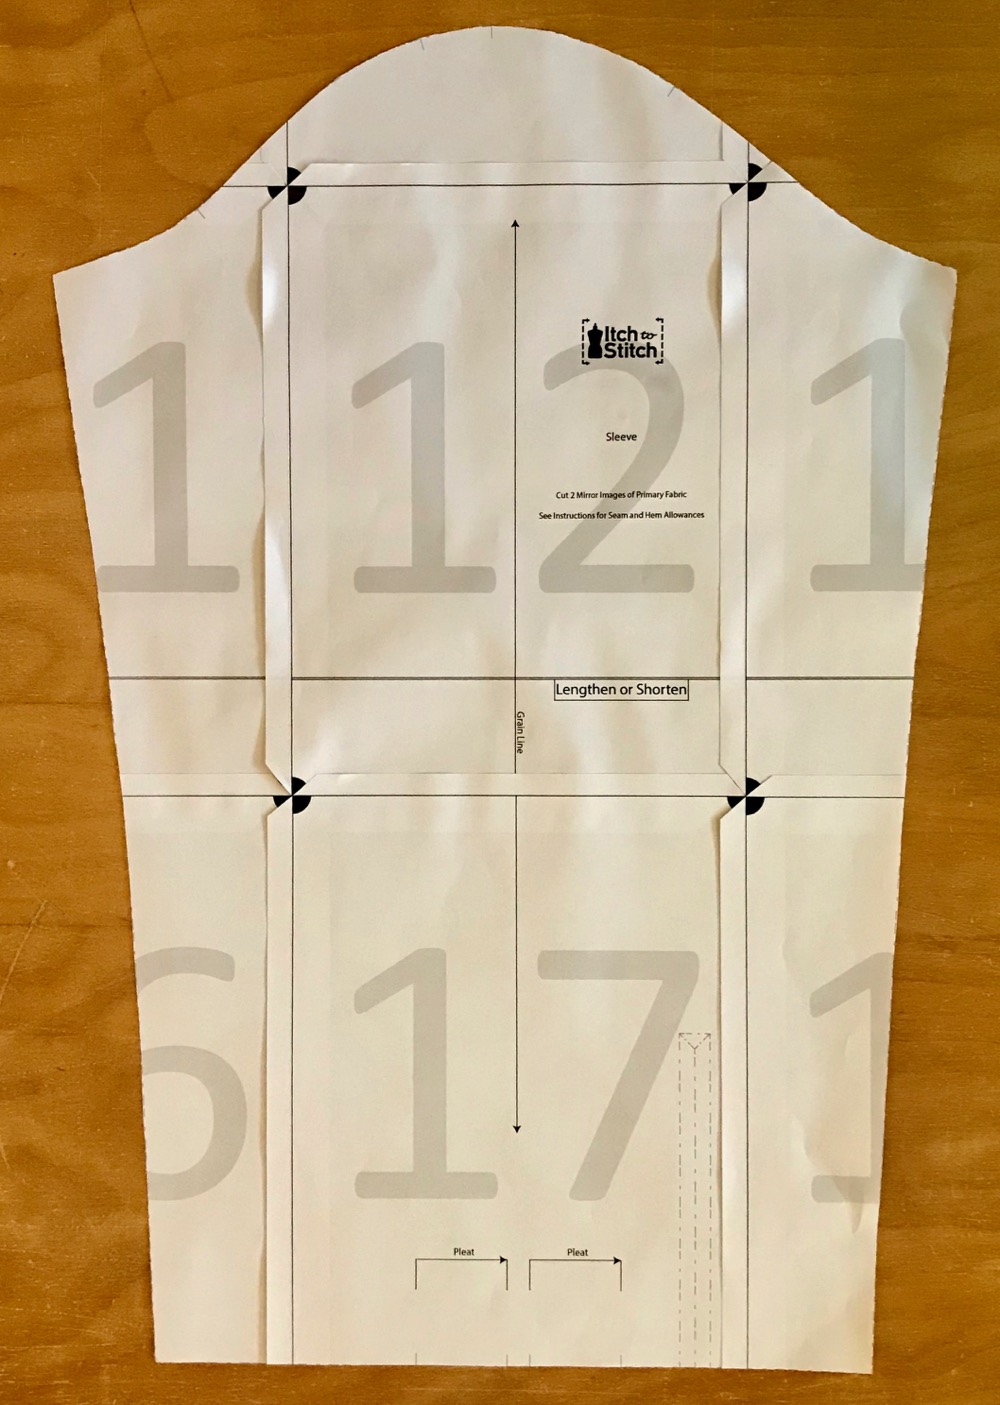
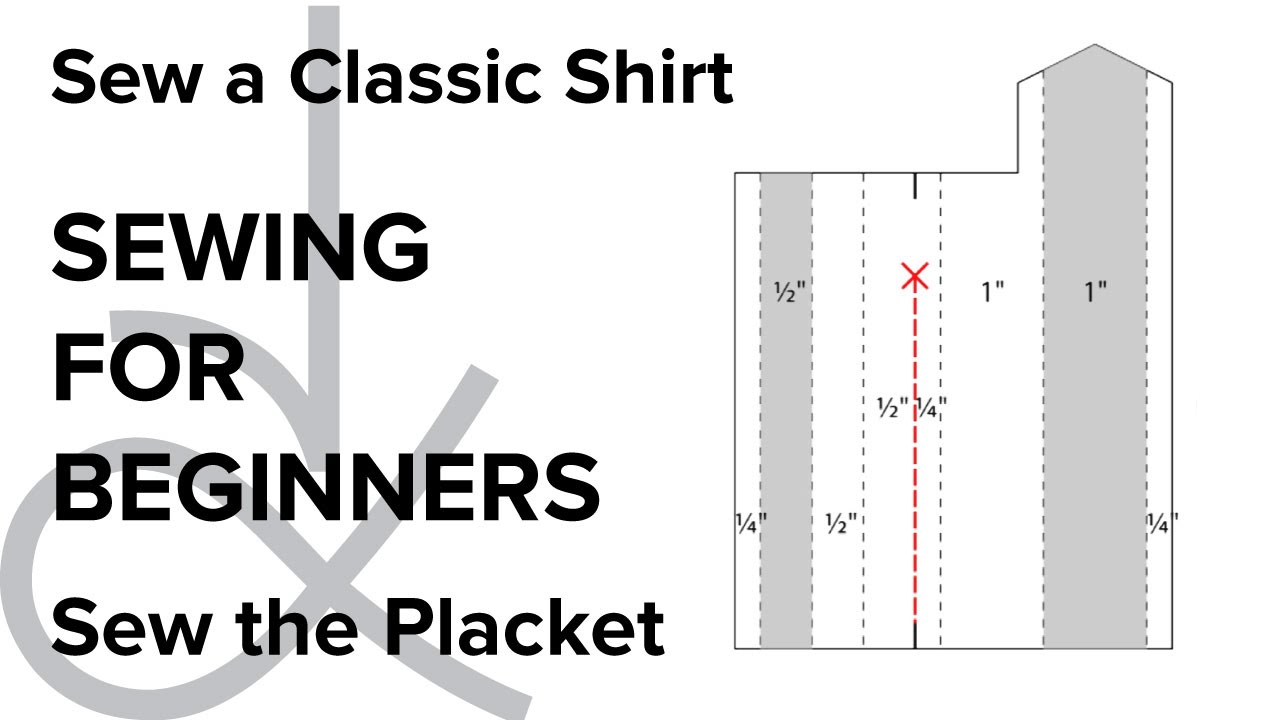
The pattern adapts easily for each wearer, and its 1-inch finished width gives enough room for buttons. I recommend making a few sample plackets for practice. The payoff is a polished, refined sleeve finish. Mark the sleeve and prep the placket pattern. Make a practice placket first, and use a fabric with obvious wrong and right sides to.

Drafting a cuff placket Sewing sleeves, Blouse pattern sewing, Sewing shirts
Basic Button Placket This is the easier one. Both sides are identical and there are just two folds. The pattern should have notches where to fold. The Hidden Button Placket This is a bit more complex. You only make the buttonhole side different. The button side remains a basic placket. This example is for a 3cm wide placket.

How to Sew a Sleeve Placket SEWTORIAL
27 Are you ready to sew a popover placket? This free downloadable pattern piece and tutorial can be used with our Liesl + Co. Classic Shirt to expand your options. I used it to transform the pattern into a shirt dress. (See my Classic Shirt as a Dress post for details about lengthening the Classic Shirt pattern to dress length.)

Pin on Sewing chart
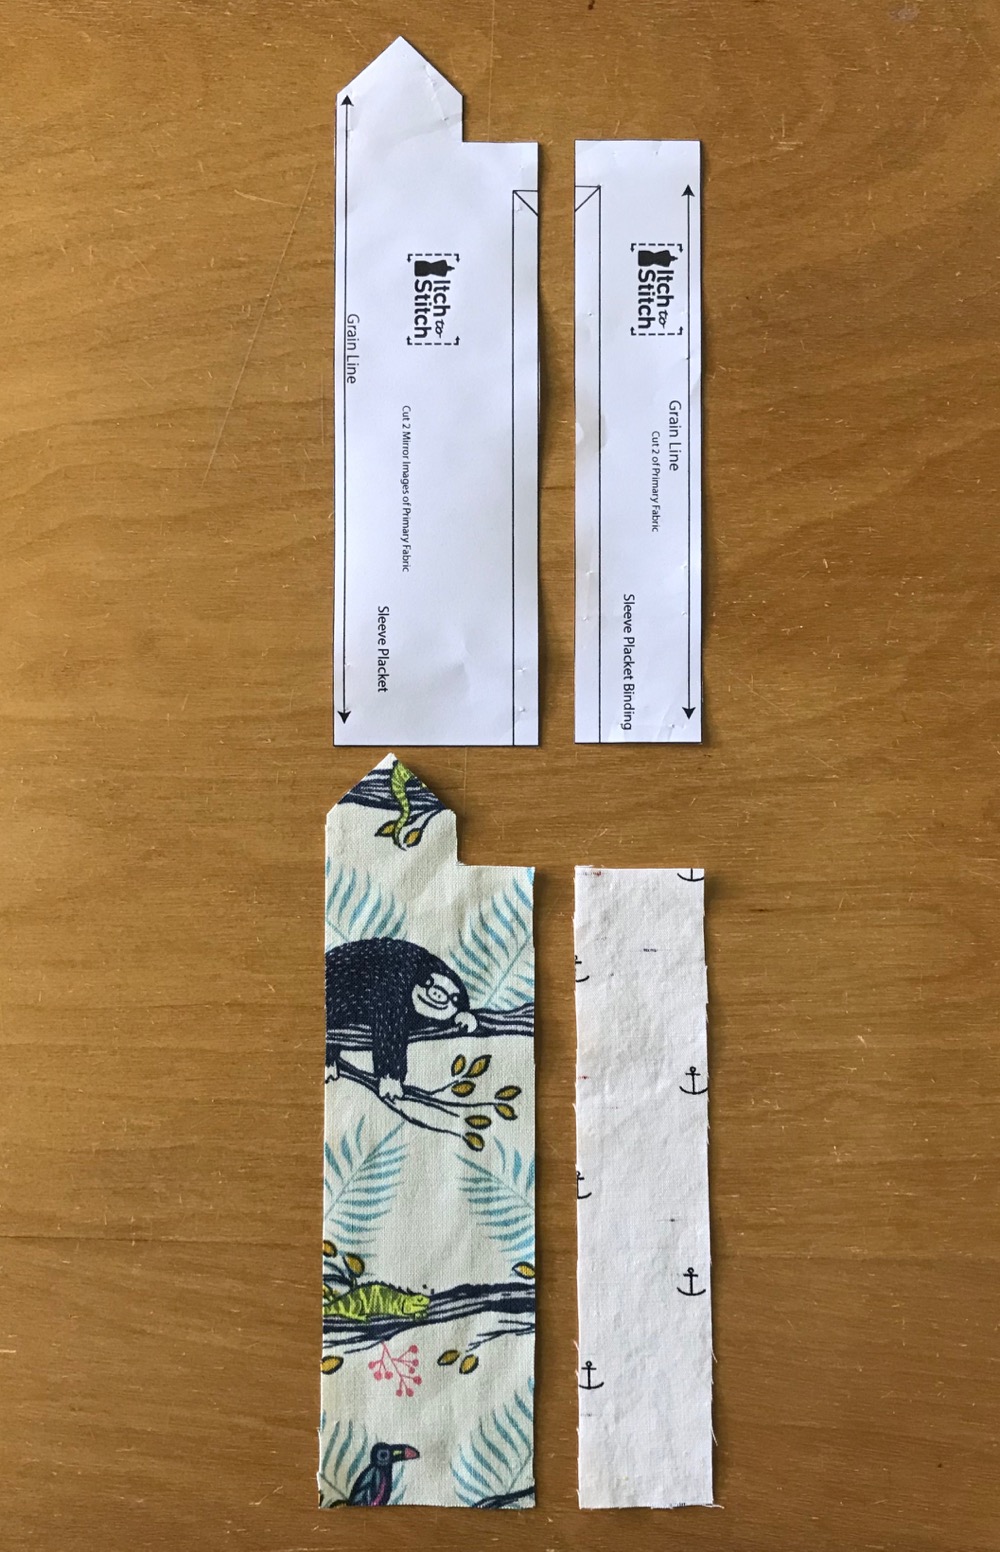
Let's dive into it! You can use them on any shirt sleeve with a cuff. My sleeve placket has a finished width of 3/4″ (1.9 cm), and the sleeve placket binding is 3/8″ (1 cm). The sleeve placket binding is usually narrower than the sleeve placket that covers it.
Tutorial Sleeve Placket Itch to Stitch
Although some of the details like the sleeve plackets, the collar, the collar stand and the button band could be challenging for a beginner, the instructions are quite detailed and there are additional tutorials linked for some of the trickier steps. I think an advanced beginner could try this pattern for their first shirt making project.

sleeveplacketpattern The Shapes of Fabric
If your pattern has 5/8" seam allowances, lengthen the Placket Pattern (at the bottom by about 3/8", and cut the sleeve-slit about 3/8" longer. That said, please remember the length and width of the placket (and accompanying slit in the sleeve) is not set in stone. Make a sample placket and change the dimensions if you want to do so.
How to sew a sleeve placket? Inseam Studios
Sew a Professional Shirt Sleeve placket with buttonIn this video how to sew a shirt sleeve placket in single piece of fabric with dual placket for button hol.

How to Sew a Professional Sleeve Placket Threads
Stitch the band to the sleeve opening using an even 1/4" seam allowance and being careful not to stitch a tuck at the placket point (2). Stitching at the point will catch only a few threads of the sleeve fabric. Press the seam flat as stitched. To finish the placket, fold the band to the sleeve wrong side and barely cover the stitching line.
Sleeve Plackets Learning Sewing
Sleeve Plackets is a 19-page tutorial that includes step-by-step instructions for creating two different types of sleeve plackets. This tutorial was originally included in Sew Confident! Series Three. This is a tutorial only and does not include any referenced patterns. Tutorial includes: Defining sleeve plackets; Shirt-sleeve placket pattern
How to Sew a Shirt Sleeve Placket, Sewing for Beginners Part 8 YouTube
Sew the left side of under placket, then right side of over placket. Then sew a square at the bottom to catch all the edges. Let's add the neck band. Cut a long piece 1 1/4″ wide. Fold together length wise and create a curved end as shown. Match the point of the back to the edge of the shirt neckline.

Tutorial Sleeve Placket Itch to Stitch
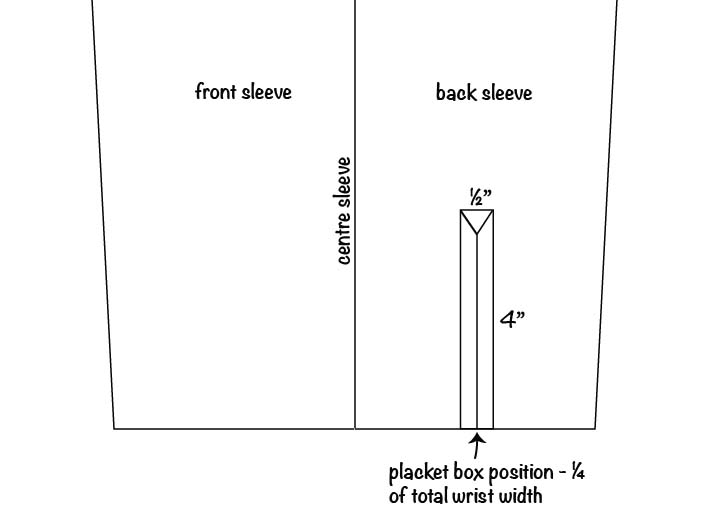
A sleeve placket is an opening at the end of a sleeve that allows your hand to fit through a narrow space easily. It's most often seen on shirts or blouses and is generally finished with a cuff. Not only it is functional, it can also be used as a design detail. At first glance, a sleeve placket might seem complicated to sew.